Showing posts with label Vanagon. Show all posts

Sunday, April 20, 2014

Giving the Van a face lift

I took the grill off for various reasons - check radiator, wiring, check out the condition of my A/C condenser, etc. and now was as good of a time as any to give it a fresh coat of paint.  I just gave it a bath, let it dry and then sprayed it with black auto trim paint.  I had the same can from when I spruced up my '83.5 and that worked out great.

Wash'n them up good before the paint job

Never did like that chrome around the edge.


Saturday, April 19, 2014

Coolant Bottle and Sensor Install

EDIT: June 27, 2014 - Install the RMW Tank.  Much of the advice below still applies to installing the RMW Tank, so read on, but honestly, I'll never install a regular VW plastic coolant bottle again.

My review of the product/install is here:  RMW "Tank" Installed!

Today, I installed the coolant bottle for my RMW Subaru conversion.  It's a standard Vanagon coolant bottle.  RMW recently changed manufacturers for their kit's bottle because the old ones had quality control issues (e.g. leaked).  Despite thinking this was a slam dunk, it turned out to be more than I bargained for and I had to do a number of modifications to install it.

First, I learned that you should drill your holes BEFORE you install the engine.  I followed the 2011 RMW manual to a "T" and this was not mentioned.  With the engine installed, a normal drill will not fit to drill the holes for the bracket.  Luckily, Paul had a mini-drill and it worked wonderfully to drill the holes despite the engine being in the way.  Also, a "right-angle" drill or adapter for a normal drill would also work.  The DeWalt adapters at The Home Depot are only $18.

Vanagon Coolant Bottle Drilling
Needed a small drill because engine was in the way!
Second, when I eye-balled the bracket and bottle placement, it looked a little too close to the engine lid.  I drilled the bracket holes a finger's pad lower than specified in the RMW manual (e.g., directly under the tab).  Even after installing the bottle 1/2" lower than RMW specified, it still hit the deck lid when I put it on.  Notice the black foam crusting off the deck lid after I put it on.  Always measure before you drill!

RMW says install directly under tab, but I had to go 1/2" lower.
Third, while the new coolant bottle from RMW are better than the old ones (caps don't leak and bottle is more solid), the cap screws on to 9 o'clock instead of 3 o'clock.  This leads to a weird hose routing from the overflow tank to the bottle  It has to do a wrap-around to get back over to the nozzle on the cap.  Oh well.  

Vanagon Coolant Bottle Installed
Cap tightens to 9 o'clock, leading to weird coolant hose routing
Last, I have an '86 Westy, which has an old style coolant level sensor and connector.  VW released an upgraded sensor/connector for late models.  The late model coolant level connector uses a metal spring loaded wire that keeps it snug on the sensor.  The old style connetor can easily pull off the sensor rendering it useless.  Funny thing is... the new, better style sensor is cheaper than the old style sensor!  To get the proper connector for it, all I had to do is go to the salvage yard and pull one from a mid-90s Jetta ($2).  I will solder this one on to my coolant level sensor wires in the Subaru/Vanagon wiring harness.  BTW:  I purchased the new, cheaper coolant level sensor from Van-Cafe.  I'm all set with upgraded parts!  So, happy...

Late Model Vanagon Coolant Level Sensor Connector
Connector I pulled from a  mid-90s VW Jetta

Fits great on the newer, late model Vanagon coolant sensors


Wednesday, April 16, 2014

Subaru ECU Placement - Rear Passenger Tail Light Compartment

I've decided to re-position my Subaru ECU in the passenger tail light compartment that is opened up when the VW engine, relay and air snorkel are pulled out.  Here's a basic photo of the protective ECU box I'm installing and its location in the engine bay.

ECU box placement in rear passenger tail light compartment

Many people do not want to put their Subaru ECU in the engine bay, citing things like "the elements will ruin your ECU" or "VW engineers did not put ECUs in the engine bay and they know best".  Well, that was the 1980s and things change as technology and innovation advances.  Besides, if VW engineers know "best", why am I replacing their engine with a Subaru?  :)

Subaru/Vanagon conversion experts likeVanaru (Vanaru.com), Ben @ (benplace.com) and Paul Guzyk (BoulderHC.com), do every conversion this way and are quite successful at it.  I personally chose this location for many reasons:
  1. The wiring harness ends up clean and straight forward - essentially, the wiring harness becomes a true plug-and-play, turn-key installation.  Initially, I went with a RMW harness (their default location for the ECU is in the rear bench seat), but this solution ends up being two harnesses, one for the main engine and another separate sub-harness for the ALT, voltage sensor, AC compressor, starter, fuel pump, and coolant level sensor.  After seeing the slick turn-key solution provided by Vanaru that easily combined all these into a single harness, I just had to redo it that way!
  2. This single, wiring harness is visible 100% from the engine bay rather than having some portion of it tucked away behind the firewall.  I like being able to easily inspect my harness without getting under my van.
  3. The wiring harness wraps around the back and top of the engine bay, staying out of the way of road hazards.  In contrast, when locating the ECU in the rear bench seat, the wiring harness is exposed to these hazards between the firewall and bench seat opening.
  4. It utilizes the newly opened space in the engine bay that would be wasted otherwise.
  5. It opens up room for storage in the rear bench seat or closet, which are two other common locations for Subaru ECUs.  That said, I'm a storage Nazi.  For instance, I'm also removing my rear heater to open up even more space under the rear bench seat. You may not care about storage like I do.
  6. Diagnostic ports (OBD2 and the proprietary Subaru ones) are more easily reached right in the engine bay compared to the rear bench seat area.  So, a mechanic can more easily scan & reset codes from this location.
The photo here shows how I plan to layout the harness.  It is based on the Vanaru design.  It will be basically the same except where noted in RED.  I'll be tying in my ALT harness into the main harness a little differently.

Example Vanaru conversion that I'll be using as a prototype for my wire harness layout and ECU box placement

If you put your ECU in the engine bay, you need to protect it from the elements!  I describe how I am doing this with full step-by-step DIY "how to" here:  http://westycamper.blogspot.com/p/ecu-box.html


Saturday, April 5, 2014

New BOSCH Starter Installed

Word on the street is that you should put in a nice, new starter when doing a Subaru conversion.  The engine takes a weeee bit more to crank and considering how you have to take the whole frigg'n Subaru engine off the trany just to install a new starter, now it the time to do it when they are apart anyway.

I have an '86 Weekender, which was the last year VW put in the wimpy HP starters.  Given the later model Vanagon starters, which are beefier, fit fine in the early model vans, I opted for one of those to make sure I had enough cranking power.  We will see!

EDIT: July 16, 2014 - This starter works awesome for my Subaru 2.5L.  It turns over immediately every time.  Only time will tell how long it lasts, but very very happy so far with it.

SR401X - packs more HP than the old one for my '86


New BOSCH starter on the trany


Friday, March 21, 2014

Wiring Up VSS and OBD2

Here are my plans to wire up VSS and OBD2 connector from the rear of the van to the front.  It is important to have a good signal for the VSS, so shielded 18 AWG copper wire protected by OEM level sheathing was chosen.  The cable has 6 wires, so the other 3 will serve to send OBD2 power, ground, and codes signal from the rear to the front.  There are only 3 wires required for Subaru codes, so I am going to cut a regular OBD2 cable, splice the three wires I need to send, and only route those to the front female connector.  Also, I have a Subaru diagnostic port (includes an female OBD2 connector, of course) that I found at a UPull & Pay for $2.  I'm going to split the signal to that port as well so mechanics working in the back of the van will also have a signal.

A., B, and C. are all housed in a water-proof poly-carbonate case along with the Subaru ECU.
Depending on whether the 3 PIN connectors are put into the VW black box or kept exposed in the engine bay will determine the quality of connector I use.  At the front of the van, all the wires are protected under the dash, so they will be standard connectors.

Last, I will actually be running 2 cables (e.g., 12 wires total) under that van.  The spare wires will come in handy when hooking up Subaru Cruise Control and aftermarket gauges when the time comes.


Saturday, March 15, 2014

Upgraded radiator hoses & stainless steel coolant pipes

This weekend, I installed my new Rocky Mountain Westy stainless steel coolant pipes.  I also plugged in a nice, new set of silicon radiator hoses from Van-Cafe.  The new radiator hoses are able to handle larger spare tires, which I will have in the near future (my main tires are 16" and stock is only 14").  The radiator itself was basically new, so instead of swapping it out, I'm selling my new Behr radiator to another Subaru/Vanagon conversion effort here in Boulder that needs it more than me.

Van-Cafe Silicon Radiator Hoses
The RMW coolant pipes actually go in separately, but I put them together beforehand to show them off compared to the old plastic pipes from VW.  Which would you trust your nice Subaru engine with!??

Coolant Pipes:  RMW Stainless Steel vs. 28 year old VW Plastic

Rocky Mtn Westy coolant pipes installed!
The next step is to get the hand re-furbished Vanagon fuel tank installed back under the van where these coolant pipes are.


Saturday, March 8, 2014

Vanagon Fuel Tank

To install the Rocky Mountain Westy stainless steel coolant pipes, first one must remove the Vanagon fuel tank.  This was a chore, but well documented elsewhere online and in the Bentley.  I had the fuel tank replaced on my previous '83 Westy and it was a costly job.  The tanks on these vans generally go at some point.   My '86 Westy's tank was in beautiful condition (e.g., California Van :), but still it did have some minor rust where it was scratched.  Given the amount of work to remove and redo a fuel tank, I chose to sand, seal, and protect it with truck bed liner.  I only want to do this once!  ONCE!  The project took literally all day.  No kidding!  The toughest part was de-greasing the tank to ensure the truck bed liner would stick and stay when applied.  Many times I looked back and thought "geeze... I could buy a new tank for $180 + shipping!"  I read online about aftermarket fuel tanks having quality control issues and decided to reuse, refurbish my OEM tank.  Glad I did!  It looks great.

De-greased and sanded

Fuel line venting

Finished product with truck bed liner rolled on

Truck bed liner looks sharp!  And, protected for a long time now!

Wednesday, February 26, 2014

Small Car Interface Board


EDIT July 7, 2014: The SC interface board does not eliminate the common P0461 - Fuel Level Sensor code.  The ECU requires variable voltage (e.g., low vs. high) and the SC interface board only sends constant volts.  This is a shame.  It will not eliminate all codes related to the conversion!

After several calls to Small Car, I have my interface board setup.  The legend they ship with the product has much to be desired, but Mao at SC was super helpful over the phone. So kudos to SC customer support.  ** My car is a 2001 Subaru Legacy and these mappings may not work for other models.

RMW Wiring Harness Wires Mapped to SC Code Eliminator Board


Subaru Wiring Harness wires set into the SC code eliminator board

Alternator Wiring Harness

Here's my Subaru/Vanagon alternator harness design.  The main RMW wiring harness does not include the ALT, starter, fuel pump, A/C compressor, voltage sensor or coolant level sensor!  So, I had to create my own sub-harness for these and figure out how to integrate them into the VW and main wiring harness.  This took a lot of brain cycles, hence my posting here to help others in the same predicament.

I am looking for a better way to do my wiring harness, in general, to make it a more turn-key install rather than two separate harnesses like this.  I'll keep you posted!

EDIT April 16, 2014: 
With the new decision to place my Subaru ECU in the rear passenger tail light, I can combine this sub-harness described here directly into the main Subaru harness.  What does this mean to my original design here?  For one, the fuel pump wire is shorter and directly connected to the ECU and their is no need to have the extra "pluggable" connectors since the wiring will be one main harness rather than the two.   Since it is now one, single harness, it all goes into the black box in a single location, so no need to mess with the extra black box grommet.

For more info, see my new solution here:  
subaru-ecu-placement-rear-passenger


A sub-harness is required when integrating a RMW wiring harness because it does not include these components

Tuesday, February 25, 2014

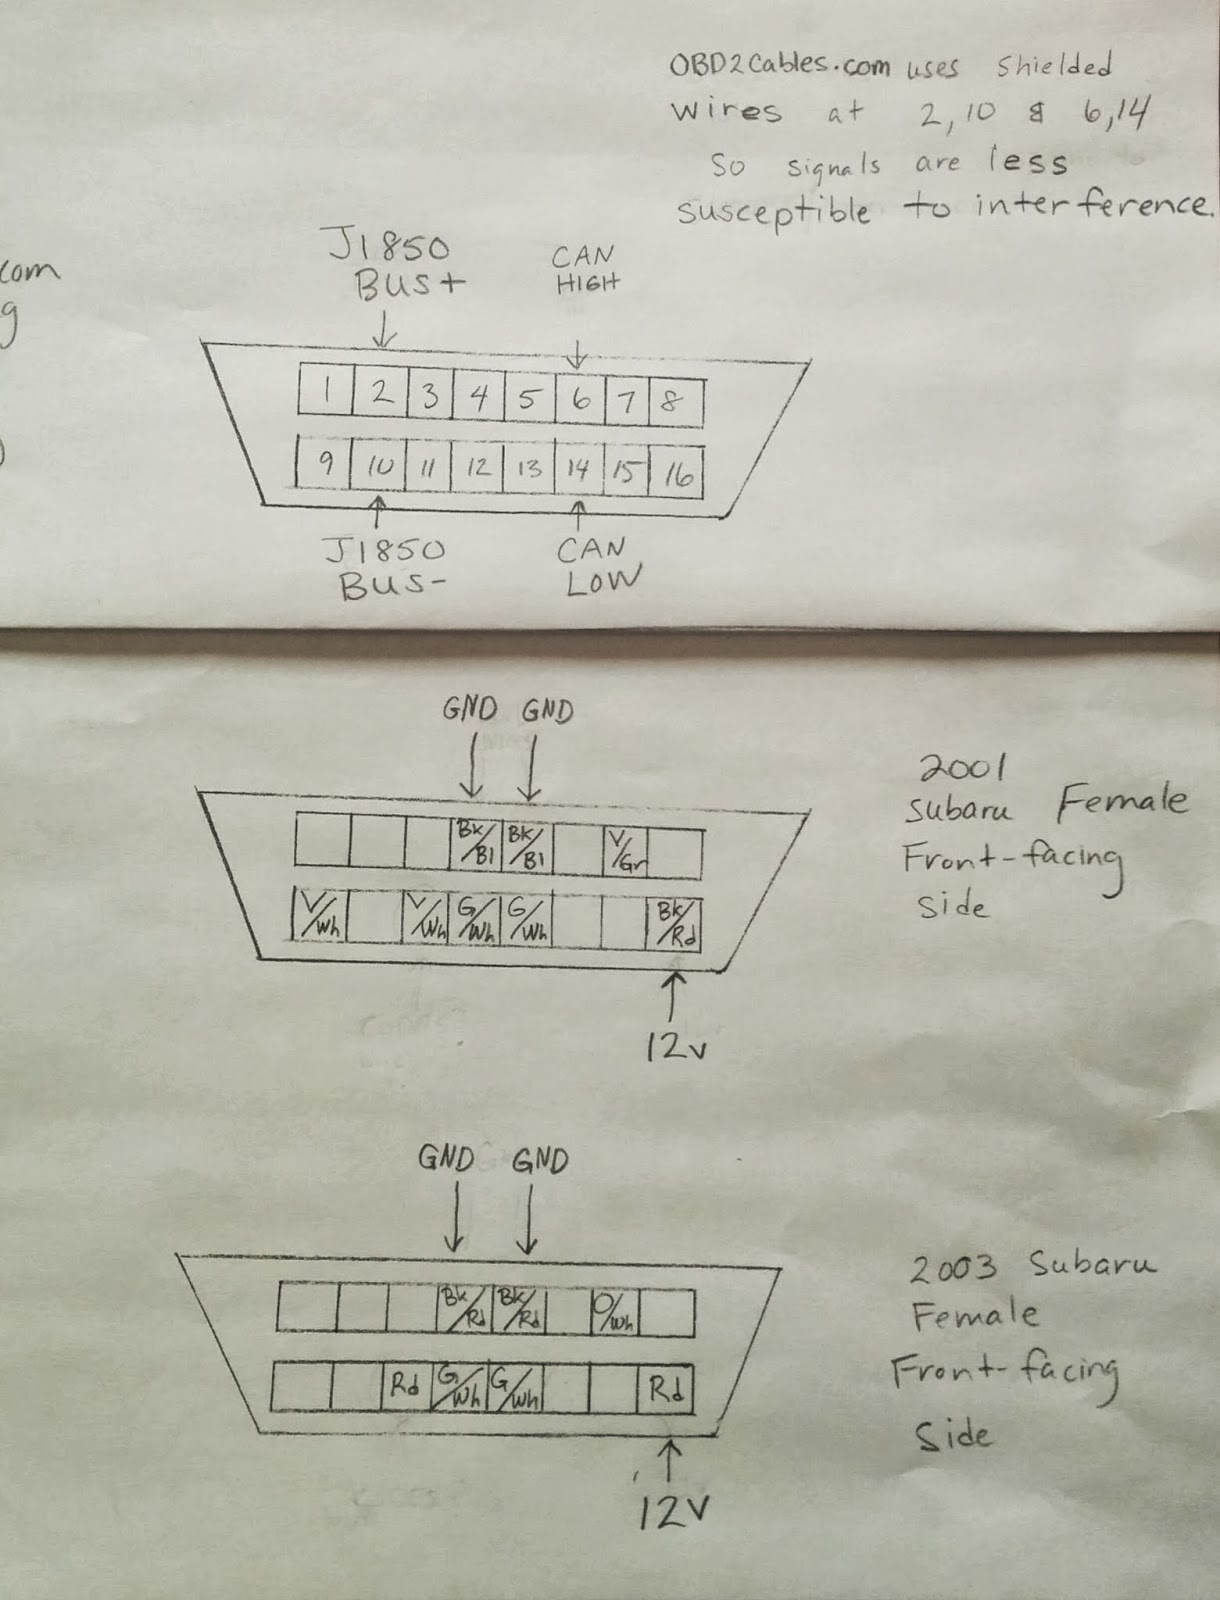
Need to wire this up... What pins are really required!?


Currently, I'm struggling with how to connect the least # of OBD2 wires from the engine bay of my van to the front, where I will have a diagnostics port available near the dash.  Paul Guzyk mentioned that a mechanic is going to want to plug in their favorite scan tool up front and drive around to diagnose a problem and that made perfect sense.  However, I don't want to run 7-8 OBD2 wires all the way up front, so I need to get only the ones I really care about out of these connectors!

Subaru pin-outs vs. OBD2Cables.com pin-outs

These are all 'front-facing' on the female connector.  Neither of the Subaru OBD2 connectors have pins in then 2,10, 6, or 14 positions.  These are the positions OBD2Cables.com uses for their shielded 'signal' wires.  They are shielded to prevent interference when transferring the codes, etc. to and from the ECU.

Also, curious as to why my 2001 Subaru has an extra pin (Violet/White wire in pin #9) that the 2003 Subaru connector does not.  I have no idea why.

OBD2Cables.com vs. 2001 Subaru vs. 2003 Subaru


When comparing an online guide to Subaru pin-outs to my Subaru connectors, I see a big difference.  For instance, neither of my connectors have pin 6 or pin 15.  My Subaru connectors do have pin 7 (K-LINE) in common with the table, which might imply signals are sent over pin 7; however, this is not how OBD2Cables.com builds their cables (see above).  If it were so, OBD2Cables.com would have shielded wire for pin 7 as well.

UPDATE: April 16, 2014 - I chose 5, 7, and 16 based on this chart.  
Note:  Hans at Vanaru recomended also wiring up 4, which is a GND as well.


Sunday, February 23, 2014

Successful Trip to U-Pull & Pay !

The plug/connector on my van's coolant level sensor turned to dust (literally) when I pulled it out of the bottle during my conversion efforts.  I looked online and found new OEM replacement parts from a company in Canada called GermanSupply and some other import place...  They were both asking, I shit you not, $10 + $17 (shipping) = $27 total, for a part that is the size of my thumbnail!  So, I got on my coveralls and hit the trusty scrapyard where I pulled two plugs for a total of $4.  Good day I say!  These came from an '88 Jetta and an '85 Golf, but they still work with my '86 Vanagon :).

Now I have a spare too!

Things I did this weekend

Today was a productive day at the shop.
- Installed Rocky Mountain Westy Adapter Plate & Flywheel
- Installed new Sachs Clutch kit
- Installed new VW shift linkage to the transmission
- Removed old, rear drive axles
- Changed transmission fluid to new Redline MT-90.  Put in 3.7 qts and it never leaked out the fill-hole.  I stopped at that since Bentley manual says 3.2-3.7 qts.
- Worked through minor wiring harness question with my mentor, Paul.

Here are the highlight reel from the day's activities:

Metal shavings on the magnetic transmission drain plug.

Newly installed shift linkage

Axle missing from transmission side.

Axle missing from the wheel side.

Using a wrench to torque down flywheel bolts

And, finally!  Adapter plate, flywheel and clutch installed on the Subaru.


Friday, February 7, 2014

Vanagon 2.1L Engine is OUT

This summer, I bought my California Vanagon on CraigsList "sight unseen", hopped a one-way flight to Burbank to go get it, and drove it home to Denver.  In a strange twist of fate, a Californian bought a Vanagon in Leadville "sight unseen", hopped a one-way flight to CO to get it, and drive it home to Cali.  His engine is damaged, so he is replacing it with mine to drive it back to Cali.  I know it will make the trip just fine as it did for me!!  :)  

My old VW engine will back to it's homeland soon...  Peace out.

My 2.1L waiting for a new home in an '87 Westy

Empty engine bay.  Lots of labels, so I know what to keep and remove for my Subaru swap!

Tutorial: How to crimp connectors, strip wire and use heat shrink.

Anyone doing a Subaru/Vanagon conversion themselves will surely be involved in some wire crimping at one point or another.  This video is great.  It discusses tools to wire strip, crimp, and heat shrink properly and a lot of techniques and gotchas to watch out for.


Wednesday, February 5, 2014

SmallCar shipped my order!!!

Psyched to be getting this shipment soon!  What is all this shit?
Well, Vanagons have the oil dipstick accessible from the back license plate, which is nice and easy to check without unloading all your gear in the back.  However, once you install a Subaru engine, this luxury is not available to you unless you buy an expensive, custom oil pan for about $300+ or you buy a SmallCar flexible dipstick for $80.  Luckily, my van has lifted springs, so I have enough ground clearance with the stock Subaru oil pan.  I picked up the flexible dipstick instead and hopefully it works as well as they claim.

An Interface Board is a "code eliminator".  The Vanagon has less sensors than the Subaru, so it doesn't have all the signals to send the Subaru ECU about its health.  This sends fake signals to my Subaru ECU to make it think everything is OK and therefore, not throw false "Check Engine Light" warnings constantly.  And, getting an upgraded tachometer and face that goes to 7K RPMs will be a better representation of the Subaru engine over the stock VW's 6K RPMs.


Tuesday, February 4, 2014

SubaruVanagon Alt Wiring Design

One of the toughest parts of this SubaruVanagon conversion has been the wiring.  The instructions and diagrams I've seen are hard to understand.  Today, I'm posting a photo I sent to RMW and the subsequent diagram I created to wrap my head around it better.  Hopefully, this will help others, who are in my same boat as well.

The main concern with the design shown in the photo & diagram attached is around the Bl/Rd voltage regulator sense wire.  RMW instructed me to wrap it around, crimp an eye-let on the end and connect it directly to the alternator as shown in the diagram and photo below.  However, I've been told by experts online at SubaruVanagon to connect to the B+ post via a 10 amp fuse in the black box.

Which way do I do it?  I need a tie-breaker!  LOL!!!

UPDATE (February 7) - Tie-breaker results are IN. 

Based on feedback from numerous folks that have done it this way and Paul, my mentor, who says "electrically they are the same result"...  I will implementing as designed here.

Photo of my alternator harness with RMW comments
How the photo translates in my head...

Sunday, January 26, 2014

Labeled the VW Engine

Today, I spent about 4 hours labeling my VW Vanagon engine before it gets pulled.

I focused the labeling on the wiring harness and hoses that went through the "firewall" to the front of the van, so they are preserved when the engine is pulled.  The labels should allow me to know what to hook up to the Rocky Mountain Westy kit's hoses/harness when the Subaru engine is hooked up.
I used the Bentley Vanagon manual to figure out what is what and if I still could not figure out, I posted photos of engine parts to TheSamba.com.  I got feedback within 2 hours of posting and was easily able to label the remaining parts.
 Driver Side
The driver side of the engine bay has most of the wiring harness, since that is where the Vanagon brains come through the firewall from the bench seat.  This side as the oil pressure sensor/switch, temp sensor and sender, ignition wiring, and the AC hoses and wiring.  I will not be hooking up the AC right away, so it is important to keep all that stuff labeled until that time comes.
Passenger Side
Some funky stuff happens on the passenger side with air intakes, vacuums, and power steering.  There are some VW sensors like Air Flow Meter, Throttle Position Sensor, and P/S pressure sensor that I won't care about since these will all be done by the Subaru engine instead.  There are vacuum hoses that come from a vacuum actuator located in the rear wheel well on the passenger side.  I am not sure how important these are once the Subaru engine is installed, but it is worth a label to keep them all organized.

Saturday, January 25, 2014

Subaru Intake Manifold Installed

Today I finally installed the intake manifold back onto the Subaru engine block. To do this, I had to do the following modifications, which were unplanned (e.g.:  undocumented in my 2013 Rocky Mtn Westy Installation instructions :):
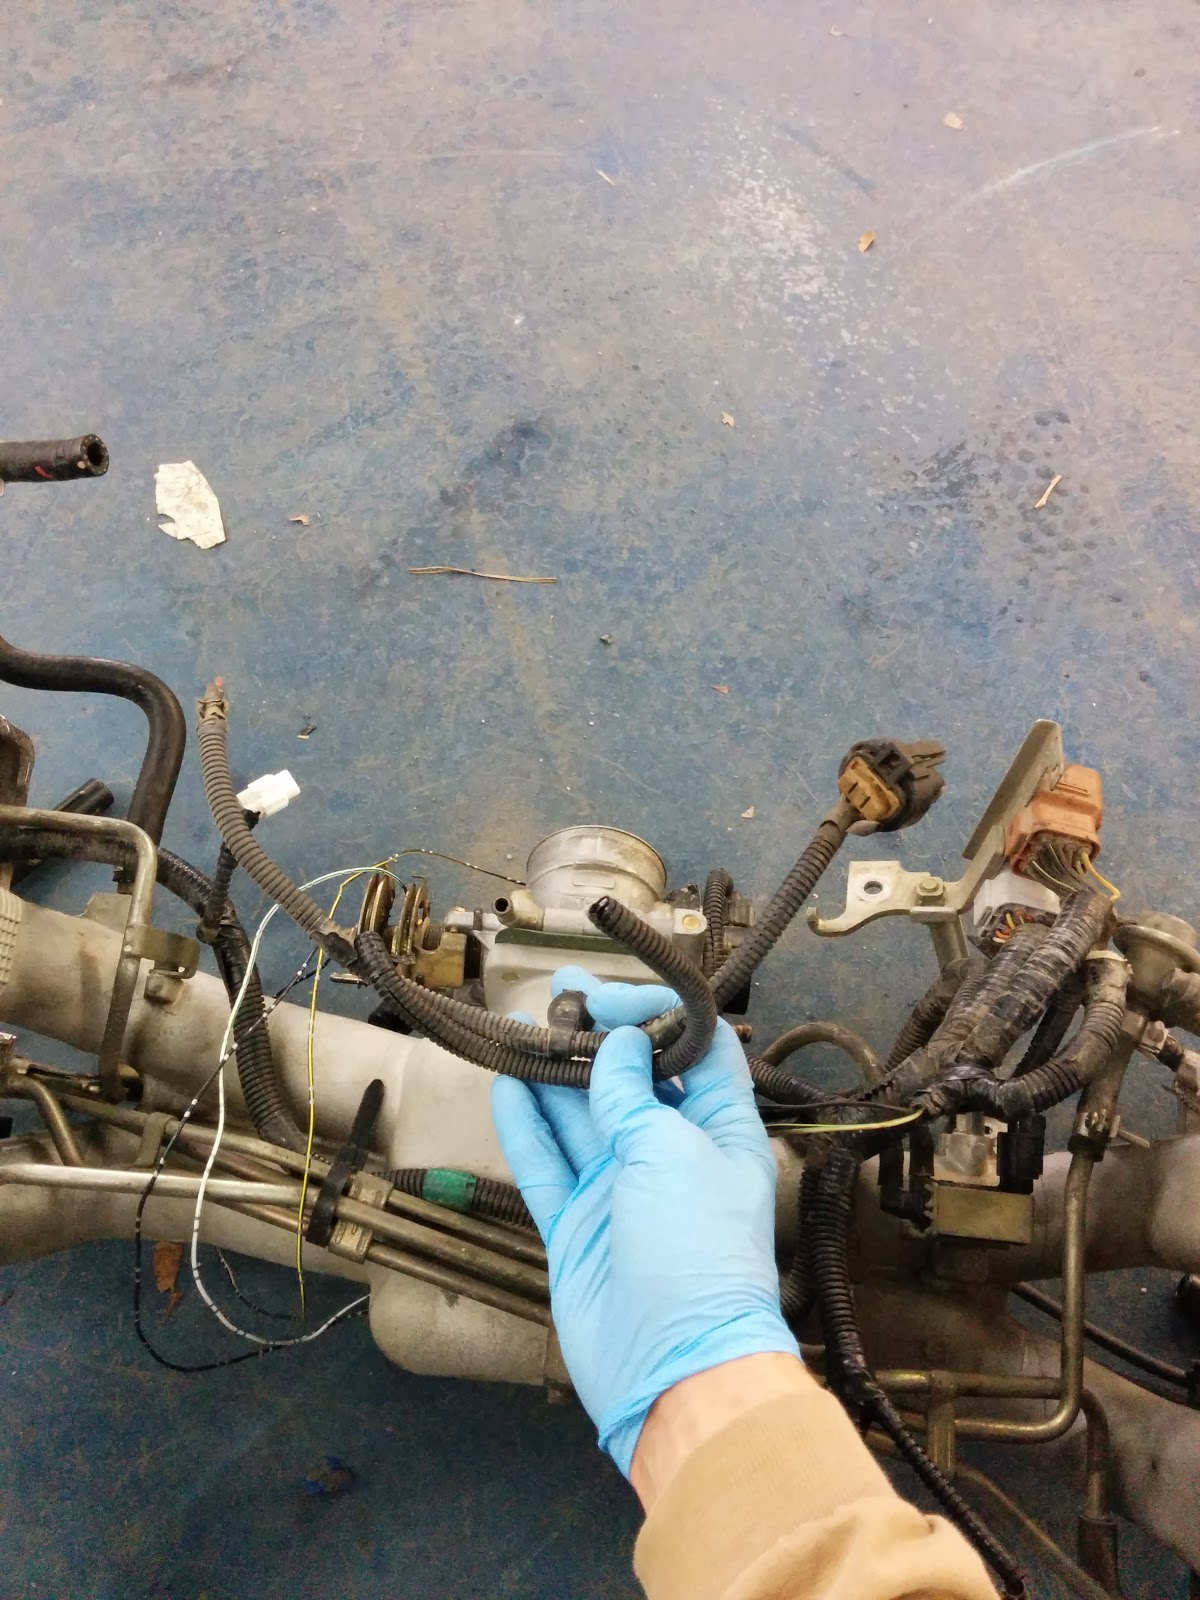
  1. Lengthen the Subaru 3 pin temp sensor wires, so they reach the new location on the RMW reverse coolant manifold.  This was my first soldering experience.  It probably shows in the workmanship too.  Oh well!
  2. Remove the corner guard on the Subaru engine because it got hung up on the RMW reverse coolant manifold where it exposed a pipe to the expansion tank.
  3. Bend up some tubing underneath the Subaru intake manifold so it didn't interfere with the relocated Subaru temp sensor.
Once I did these unplanned modifications, the Subaru intake mani seated just fine.  Then, I finished by plugging in all the other intake harness plugs and tightening the bolts to factory specs.  Job done!


When I had Rocky Mountain Westy do my wiring harness, I had them save all the scraps.  Can you tell!?  This came in handy as I was able to sift through and find the exact colored wires for the Subaru temp sensor modification I needed to perform.

I also kept all the connectors, which I may or may not need for extending various parts of the wiring harness.


This was my first soldering experience, but after some expert advice, I was able to wrap and solder the wires.  I used tape to secure the wires and sensor so they didn't move while soldering them.  Think of it as a vice for wires.

The soldering gun I bought was 25w and it did not heat up the wires very well, so I used Paul's, which was beefy and worked much better.


After soldering the wires, I used a heat gun and melted heat shrink around these areas to seal them up.

The final step was to wrap and tape them.  Rather than buy this stuff, I went back to my Subaru donor car and pulled the headlight wiring off then cleaned up and used the wire wrap to protect my newly lengthened temp sensor wires.  It worked like a charm. It is so nice to have a full car to pull parts from as needed :)
End product - extended Subaru temp sensor
And the final product looks like this.  It was longer than necessary, but why skimp on it and have to redo it if it comes up too short?    

The RMW reverse coolant manifold has a pipe extending out for the heater hose that goes to the expansion tank.  This prevented my intake manifold from seating properly on the gaskets.    Unfortunately, this was not documented by RMW and I was puzzled a bit before getting a Hangouts reply from a friend saying, "Mine doesn't have that part on it! Just remove it!".  So, I removed the protective guard (4 bolts) and then it sat better on the block.


Finally, after bending some vacuum/breather tubing running under the manifold, it seated perfectly.


Rear engine protective cover in the way


Monday, January 20, 2014

How To Handle Reverse Coolant Manifold Temp Sensor

I checked and all the reverse coolant manifolds (Rocky Mtn Westy, SmallCar, Tom Shiels, etc.) have the temperature sensor in the same place, which leads to a problem connecting the Subaru intake wire harness back up to it. As you can see in the photo, mine is at least 6" short.  I figure there are 3 options to resolve this:
  1. Get both a male & a female 3 pin connector, more wires, and make a pluggable extension.
  2. Cut off the end, extend it with similar gauge wire to make it reach
  3. Peel back the Subaru harness, stretch the wires for the sensor over and hope they reach.
I'm opting for #2, as recommended by RMW.
#1 seems about the same amount of work, but I'd have to source the connectors.  #3 seems like a lot of work for something that may not even fit after it is done, or maybe it will fit, but will be so tight, it will suck to work with.  So, #2 it is.


Saturday, January 18, 2014

Installed New Subaru P/S Pump

Today, I bought a 2002 Subaru P/S pump from Super Rupair ($45) and installed it.  The original had been ruined when my engine tipped over onto it's front.  The install was easy.  My model of Subaru has a remote reservoir, so the RMW kit's power steering hoses are made to connect remotely to my VW Vanagon P/S reservoir.

The 2002 Subaru P/S pump sensor was not compatible with the 2001 intake manifold wiring harness.  Luckily, I had the old sensor and just connected that up to both the pump and wiring harness.  Glad I kept the old one around.