 |
| Now I have a spare too! |
Sunday, February 23, 2014
Successful Trip to U-Pull & Pay !
The plug/connector on my van's coolant level sensor turned to dust (literally) when I pulled it out of the bottle during my conversion efforts. I looked online and found new OEM replacement parts from a company in Canada called GermanSupply and some other import place... They were both asking, I shit you not, $10 + $17 (shipping) = $27 total, for a part that is the size of my thumbnail! So, I got on my coveralls and hit the trusty scrapyard where I pulled two plugs for a total of $4. Good day I say! These came from an '88 Jetta and an '85 Golf, but they still work with my '86 Vanagon :).


Things I did this weekend
Today was a productive day at the shop.
- Installed Rocky Mountain Westy Adapter Plate & Flywheel
- Installed new Sachs Clutch kit
- Installed new VW shift linkage to the transmission
- Removed old, rear drive axles
- Changed transmission fluid to new Redline MT-90. Put in 3.7 qts and it never leaked out the fill-hole. I stopped at that since Bentley manual says 3.2-3.7 qts.
- Worked through minor wiring harness question with my mentor, Paul.
Here are the highlight reel from the day's activities:
- Installed Rocky Mountain Westy Adapter Plate & Flywheel
- Installed new Sachs Clutch kit
- Installed new VW shift linkage to the transmission
- Removed old, rear drive axles
- Changed transmission fluid to new Redline MT-90. Put in 3.7 qts and it never leaked out the fill-hole. I stopped at that since Bentley manual says 3.2-3.7 qts.
- Worked through minor wiring harness question with my mentor, Paul.
Here are the highlight reel from the day's activities:
 |
| Metal shavings on the magnetic transmission drain plug. |
 |
| Newly installed shift linkage |
 |
| Axle missing from transmission side. |
 |
| Axle missing from the wheel side. |
 |
| Using a wrench to torque down flywheel bolts |
 |
| And, finally! Adapter plate, flywheel and clutch installed on the Subaru. |
Saturday, February 22, 2014
Installed New Rear Axles - Made in CHINA :-/
 |
| Chinese Made Axles from GoWesty arrived |
 |
| Messy in there. Gotta clean out that grime before re-installing |
 |
| Transmission axle joint |
Friday, February 7, 2014
Vanagon 2.1L Engine is OUT
This summer, I bought my California Vanagon on CraigsList "sight unseen", hopped a one-way flight to Burbank to go get it, and drove it home to Denver. In a strange twist of fate, a Californian bought a Vanagon in Leadville "sight unseen", hopped a one-way flight to CO to get it, and drive it home to Cali. His engine is damaged, so he is replacing it with mine to drive it back to Cali. I know it will make the trip just fine as it did for me!! :)
My old VW engine will back to it's homeland soon... Peace out.
 |
| My 2.1L waiting for a new home in an '87 Westy |
 |
| Empty engine bay. Lots of labels, so I know what to keep and remove for my Subaru swap! |
Tutorial: How to crimp connectors, strip wire and use heat shrink.
Anyone doing a Subaru/Vanagon conversion themselves will surely be involved in some wire crimping at one point or another. This video is great. It discusses tools to wire strip, crimp, and heat shrink properly and a lot of techniques and gotchas to watch out for.
Wednesday, February 5, 2014
SmallCar shipped my order!!!
Psyched to be getting this shipment soon! What is all this shit?
Well, Vanagons have the oil dipstick accessible from the back license plate, which is nice and easy to check without unloading all your gear in the back. However, once you install a Subaru engine, this luxury is not available to you unless you buy an expensive, custom oil pan for about $300+ or you buy a SmallCar flexible dipstick for $80. Luckily, my van has lifted springs, so I have enough ground clearance with the stock Subaru oil pan. I picked up the flexible dipstick instead and hopefully it works as well as they claim.
An Interface Board is a "code eliminator". The Vanagon has less sensors than the Subaru, so it doesn't have all the signals to send the Subaru ECU about its health. This sends fake signals to my Subaru ECU to make it think everything is OK and therefore, not throw false "Check Engine Light" warnings constantly. And, getting an upgraded tachometer and face that goes to 7K RPMs will be a better representation of the Subaru engine over the stock VW's 6K RPMs.

Well, Vanagons have the oil dipstick accessible from the back license plate, which is nice and easy to check without unloading all your gear in the back. However, once you install a Subaru engine, this luxury is not available to you unless you buy an expensive, custom oil pan for about $300+ or you buy a SmallCar flexible dipstick for $80. Luckily, my van has lifted springs, so I have enough ground clearance with the stock Subaru oil pan. I picked up the flexible dipstick instead and hopefully it works as well as they claim.
An Interface Board is a "code eliminator". The Vanagon has less sensors than the Subaru, so it doesn't have all the signals to send the Subaru ECU about its health. This sends fake signals to my Subaru ECU to make it think everything is OK and therefore, not throw false "Check Engine Light" warnings constantly. And, getting an upgraded tachometer and face that goes to 7K RPMs will be a better representation of the Subaru engine over the stock VW's 6K RPMs.
Tuesday, February 4, 2014
SubaruVanagon Alt Wiring Design
One of the toughest parts of this SubaruVanagon conversion has been the wiring. The instructions and diagrams I've seen are hard to understand. Today, I'm posting a photo I sent to RMW and the subsequent diagram I created to wrap my head around it better. Hopefully, this will help others, who are in my same boat as well.
The main concern with the design shown in the photo & diagram attached is around the Bl/Rd voltage regulator sense wire. RMW instructed me to wrap it around, crimp an eye-let on the end and connect it directly to the alternator as shown in the diagram and photo below. However, I've been told by experts online at SubaruVanagon to connect to the B+ post via a 10 amp fuse in the black box.
Which way do I do it? I need a tie-breaker! LOL!!!
The main concern with the design shown in the photo & diagram attached is around the Bl/Rd voltage regulator sense wire. RMW instructed me to wrap it around, crimp an eye-let on the end and connect it directly to the alternator as shown in the diagram and photo below. However, I've been told by experts online at SubaruVanagon to connect to the B+ post via a 10 amp fuse in the black box.
Which way do I do it? I need a tie-breaker! LOL!!!
UPDATE (February 7) - Tie-breaker results are IN.
Based on feedback from numerous folks that have done it this way and Paul, my mentor, who says "electrically they are the same result"... I will implementing as designed here. |
| Photo of my alternator harness with RMW comments |
 |
| How the photo translates in my head... |
Sunday, January 26, 2014
Labeled the VW Engine
Today, I spent about 4 hours labeling my VW Vanagon engine before it gets pulled.
 I focused the labeling on the wiring harness and hoses that went through the "firewall" to the front of the van, so they are preserved when the engine is pulled. The labels should allow me to know what to hook up to the Rocky Mountain Westy kit's hoses/harness when the Subaru engine is hooked up.
I used the Bentley Vanagon manual to figure out what is what and if I still could not figure out, I posted photos of engine parts to TheSamba.com. I got feedback within 2 hours of posting and was easily able to label the remaining parts.
 Driver Side
The driver side of the engine bay has most of the wiring harness, since that is where the Vanagon brains come through the firewall from the bench seat. This side as the oil pressure sensor/switch, temp sensor and sender, ignition wiring, and the AC hoses and wiring. I will not be hooking up the AC right away, so it is important to keep all that stuff labeled until that time comes.
 Passenger Side
Some funky stuff happens on the passenger side with air intakes, vacuums, and power steering. There are some VW sensors like Air Flow Meter, Throttle Position Sensor, and P/S pressure sensor that I won't care about since these will all be done by the Subaru engine instead. There are vacuum hoses that come from a vacuum actuator located in the rear wheel well on the passenger side. I am not sure how important these are once the Subaru engine is installed, but it is worth a label to keep them all organized.
I used the Bentley Vanagon manual to figure out what is what and if I still could not figure out, I posted photos of engine parts to TheSamba.com. I got feedback within 2 hours of posting and was easily able to label the remaining parts.
The driver side of the engine bay has most of the wiring harness, since that is where the Vanagon brains come through the firewall from the bench seat. This side as the oil pressure sensor/switch, temp sensor and sender, ignition wiring, and the AC hoses and wiring. I will not be hooking up the AC right away, so it is important to keep all that stuff labeled until that time comes.
Some funky stuff happens on the passenger side with air intakes, vacuums, and power steering. There are some VW sensors like Air Flow Meter, Throttle Position Sensor, and P/S pressure sensor that I won't care about since these will all be done by the Subaru engine instead. There are vacuum hoses that come from a vacuum actuator located in the rear wheel well on the passenger side. I am not sure how important these are once the Subaru engine is installed, but it is worth a label to keep them all organized.
Saturday, January 25, 2014
Subaru Intake Manifold Installed
Today I finally installed the intake manifold back onto the Subaru engine block. To do this, I had to do the following modifications, which were unplanned (e.g.: undocumented in my 2013 Rocky Mtn Westy Installation instructions :):

When I had Rocky Mountain Westy do my wiring harness, I had them save all the scraps. Can you tell!? This came in handy as I was able to sift through and find the exact colored wires for the Subaru temp sensor modification I needed to perform.
I also kept all the connectors, which I may or may not need for extending various parts of the wiring harness.

This was my first soldering experience, but after some expert advice, I was able to wrap and solder the wires. I used tape to secure the wires and sensor so they didn't move while soldering them. Think of it as a vice for wires.
The soldering gun I bought was 25w and it did not heat up the wires very well, so I used Paul's, which was beefy and worked much better.
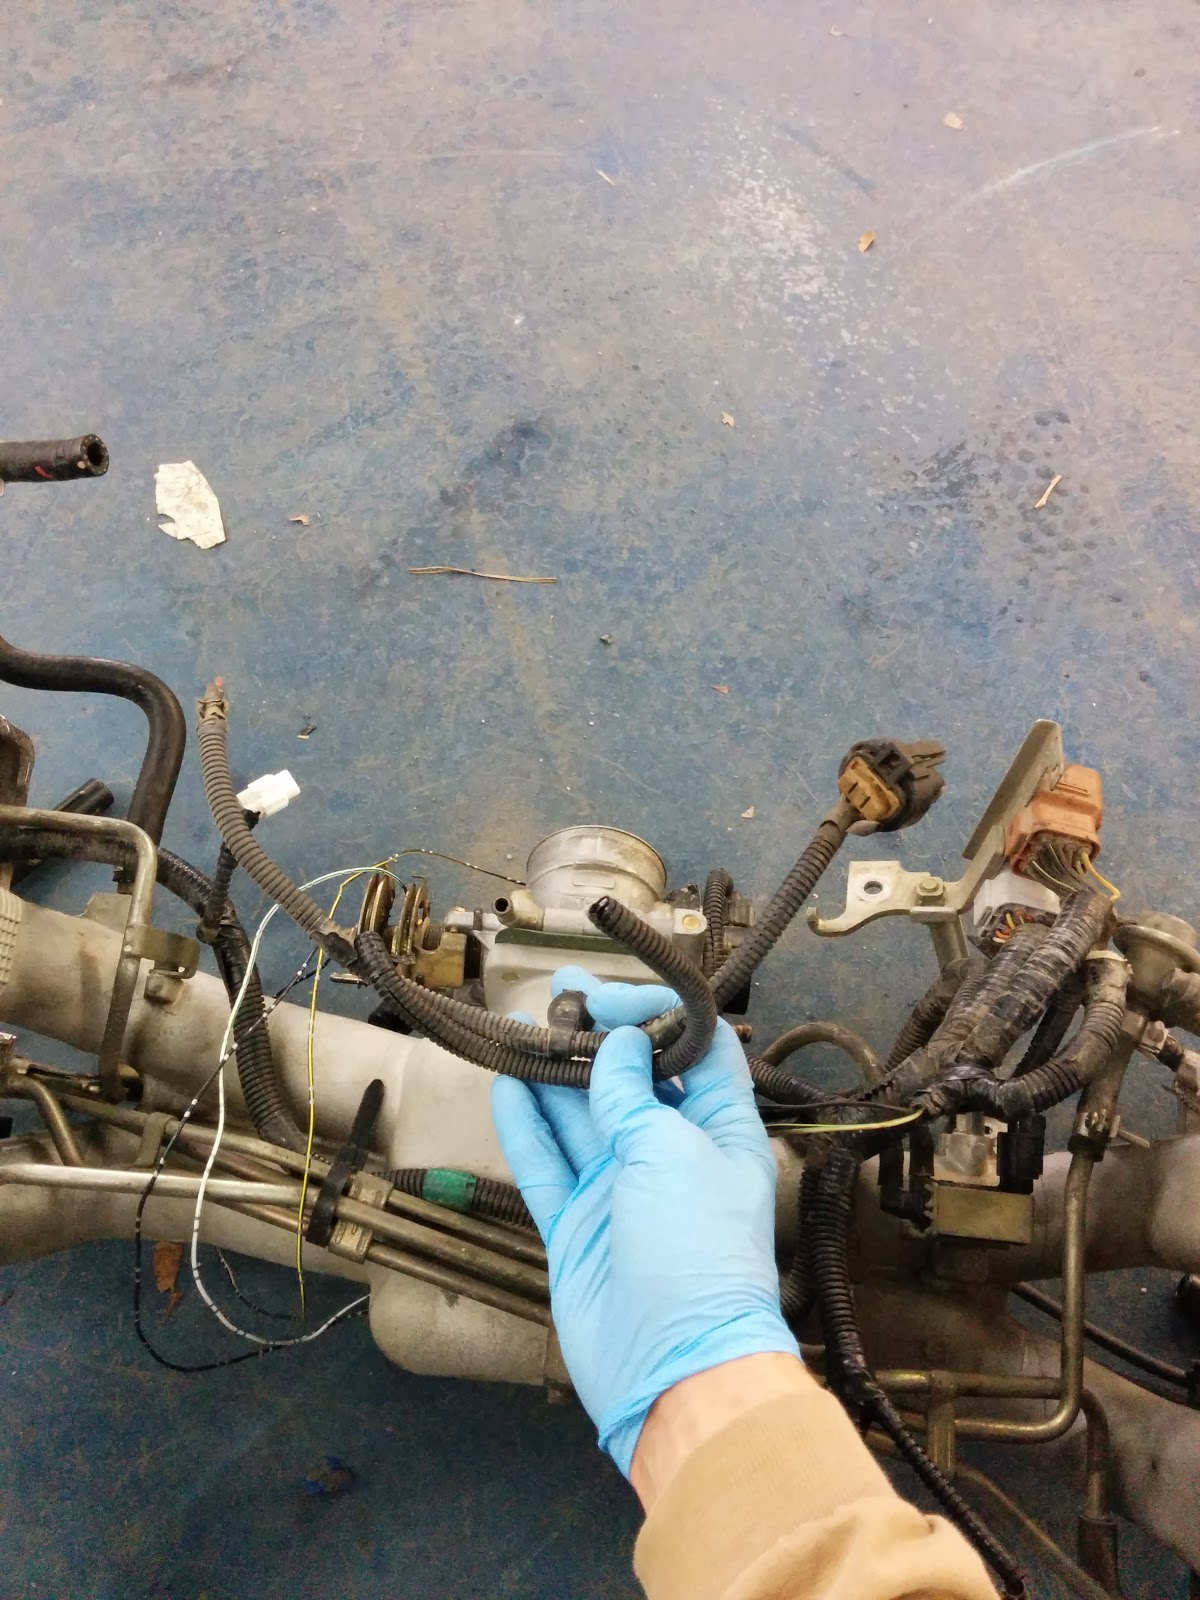
After soldering the wires, I used a heat gun and melted heat shrink around these areas to seal them up.
The final step was to wrap and tape them. Rather than buy this stuff, I went back to my Subaru donor car and pulled the headlight wiring off then cleaned up and used the wire wrap to protect my newly lengthened temp sensor wires. It worked like a charm. It is so nice to have a full car to pull parts from as needed :)
Finally, after bending some vacuum/breather tubing running under the manifold, it seated perfectly.

- Lengthen the Subaru 3 pin temp sensor wires, so they reach the new location on the RMW reverse coolant manifold. This was my first soldering experience. It probably shows in the workmanship too. Oh well!
- Remove the corner guard on the Subaru engine because it got hung up on the RMW reverse coolant manifold where it exposed a pipe to the expansion tank.
- Bend up some tubing underneath the Subaru intake manifold so it didn't interfere with the relocated Subaru temp sensor.
When I had Rocky Mountain Westy do my wiring harness, I had them save all the scraps. Can you tell!? This came in handy as I was able to sift through and find the exact colored wires for the Subaru temp sensor modification I needed to perform.
I also kept all the connectors, which I may or may not need for extending various parts of the wiring harness.
This was my first soldering experience, but after some expert advice, I was able to wrap and solder the wires. I used tape to secure the wires and sensor so they didn't move while soldering them. Think of it as a vice for wires.
The soldering gun I bought was 25w and it did not heat up the wires very well, so I used Paul's, which was beefy and worked much better.
After soldering the wires, I used a heat gun and melted heat shrink around these areas to seal them up.
The final step was to wrap and tape them. Rather than buy this stuff, I went back to my Subaru donor car and pulled the headlight wiring off then cleaned up and used the wire wrap to protect my newly lengthened temp sensor wires. It worked like a charm. It is so nice to have a full car to pull parts from as needed :)
 |
| End product - extended Subaru temp sensor |
And the final product looks like this. It was longer than necessary, but why skimp on it and have to redo it if it comes up too short?
The RMW reverse coolant manifold has a pipe extending out for the heater hose that goes to the expansion tank. This prevented my intake manifold from seating properly on the gaskets. Unfortunately, this was not documented by RMW and I was puzzled a bit before getting a Hangouts reply from a friend saying, "Mine doesn't have that part on it! Just remove it!". So, I removed the protective guard (4 bolts) and then it sat better on the block.
Finally, after bending some vacuum/breather tubing running under the manifold, it seated perfectly.
 |
| Rear engine protective cover in the way |
Monday, January 20, 2014
How To Handle Reverse Coolant Manifold Temp Sensor
I checked and all the reverse coolant manifolds (Rocky Mtn Westy, SmallCar, Tom Shiels, etc.) have the temperature sensor in the same place, which leads to a problem connecting the Subaru intake wire harness back up to it. As you can see in the photo, mine is at least 6" short. I figure there are 3 options to resolve this:

- Get both a male & a female 3 pin connector, more wires, and make a pluggable extension.
- Cut off the end, extend it with similar gauge wire to make it reach
- Peel back the Subaru harness, stretch the wires for the sensor over and hope they reach.
I'm opting for #2, as recommended by RMW.
#1 seems about the same amount of work, but I'd have to source the connectors. #3 seems like a lot of work for something that may not even fit after it is done, or maybe it will fit, but will be so tight, it will suck to work with. So, #2 it is.
#1 seems about the same amount of work, but I'd have to source the connectors. #3 seems like a lot of work for something that may not even fit after it is done, or maybe it will fit, but will be so tight, it will suck to work with. So, #2 it is.
Subscribe to:
Posts (Atom)